Naturally, the kitchen layout is a major factor defining the efficient operation flow in the kitchen. When kettle(s) has found the right location in the kitchen layout, it also has to be checked that the installation location is feasible for the several factors involved in kettle positioning, some almost self-evident and some as opinion matters. However, these all are relevant to ensuring the kettle's effective, long-term, and safe use.
1. Steady and level floor
A steady and level floor enables the kettle's correctly positioned and well-aligned installation. Naturally, the kettle needs to be in the horizontal plane. This allows the movement of mechanical components to happen as designed. Tilting up to 475-liter products requires force; if kettle parts are in incorrect positions, significant forces can go in the wrong direction. This can damage or wear the kettle structure immediately or in the long run.
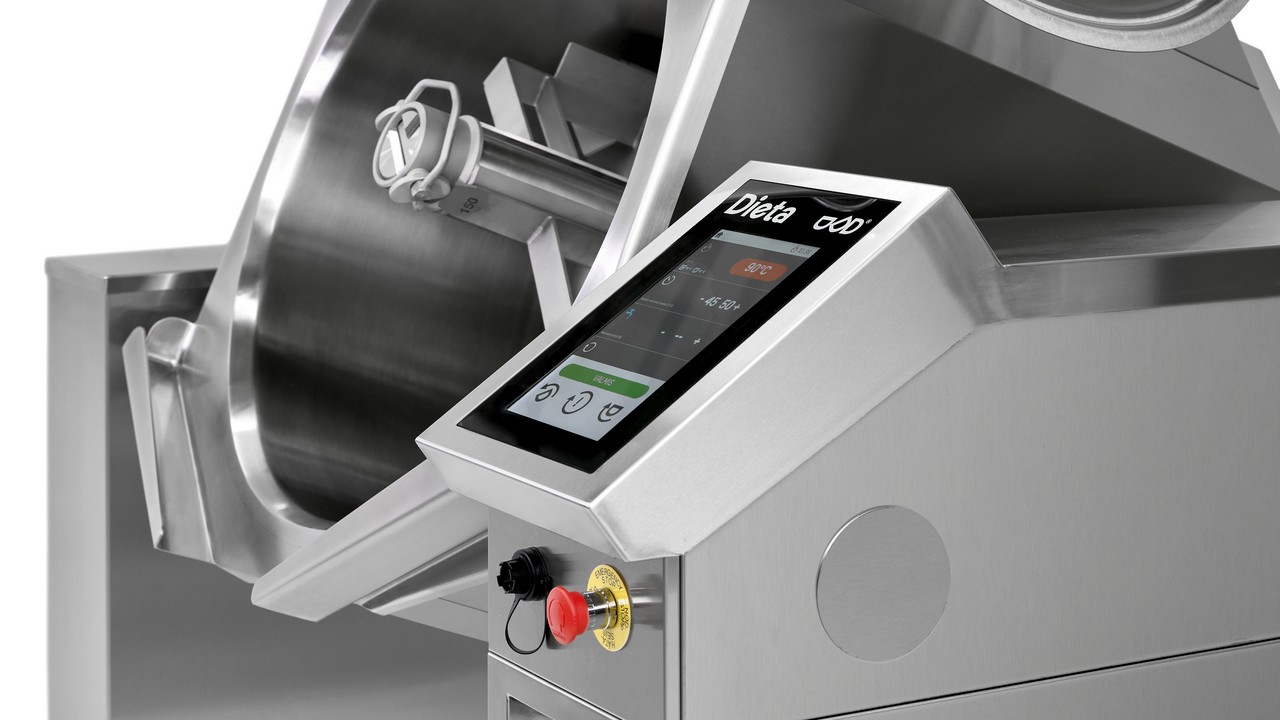
There is always an option to level the kettle with adjustments in the feet for minor adjustments. But if the adjustment required is significant, there is always a greater risk that the technician will not notice a slight deviation of the kettle from a fully aligned position.
2. Space around the kettle
The space requirement of the kettle involves absolute requirements and choices based on the use of the kettle and the operation of the staff.
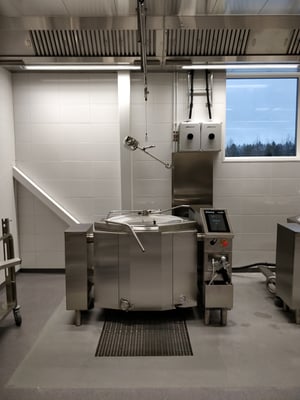
The kettle has its dimensions, in addition to which it needs enough space behind to tilt fully. This should be taken into account and checked. Dieta's Genier kettles can often be placed with rear support in touch with the back wall.The technical datasheet and installation drawings should always be checked for position requirements.
In addition to the requirements, it is good to note that the life of the high-quality kettles is about ten years, and they need maintenance at least once a year. It would be best to leave space around the kettle to allow the service technician to operate it.
The space requirement in front of the kettle is more of a preference issue. Consider enough room for personal and trolleys when adding ingredients or emptying the kettle. Depending on the preferred operation, emptying the kettle typically requires one to two persons and at least two trolleys. One person empties the kettle using a trolley support GN tray, while another handles the filled trays to another trolley. Find a few excellent tools from Dieta to help here:
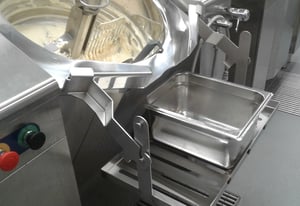
- A unique integrated scale can be used by kitchen staff to weigh "the negative value" equal to the food taken out during emptying.
- The height-adjustable GN trolley can be adjusted to the right level with ergonomic height tilting as standard in Genier kettles. This allows emptying by hand, working all the time at an ergonomic high height.
- The GN tray rack that attaches to the kettle's spout is best when tilting directly to the tray. It keeps the tray in balance during the tilting of the kettle.
You can find out more about Dieta accessories here.
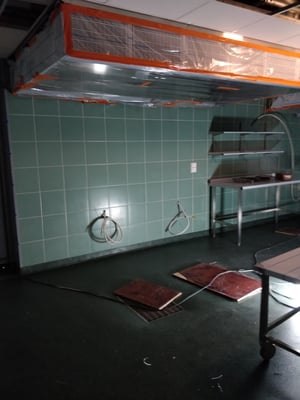
3. Floor gully
The floor drain in the front of the kettle serves two purposes; It allows emptying of cleaning water, and water released during the use exit directly to the drain. Without these, there would always be water ponds in the kettle area, causing unnecessary moisture, especially during heating. This constant humid environment can, at worst, act as an accelerator to start accumulating moisture in the kettle in places where it is not desired.
Recommendations for the dimensioning and location of floor drains are found in the datasheet or installation drawing of the kettle. The floor drain must be under the kettle so that the water outlets at the bottom (deaerator/vent, jacket drain pipe) are on top of the floor drain.
At the same time, the floor drain must be located sufficiently in front so that the water flowing during tilting still hits the drain. These already determine the length and location of the floor drain. The width, in turn, takes into account the scattering of the water flow during the tilting.
The depth of the drain defines how much water can be poured at a time. Nevertheless, no standard drain can handle any absurd uncontrolled tilt of the kettle. This causes a small flood in the kitchen.
4. Ventilation
A detailed and dimensioned exhaust hood is also required in the kettle. Although the kettles from the highest quality manufacturers are more than 98% energy efficient, they still release heat and water vapor. In particular, opening the lid of a boiling kettle momentarily releases a considerable amount of heat and water vapor. These should be removed from the kitchen - proper ventilation will ensure that heat and moisture do not spread unnecessarily throughout the kitchen.
5. Water and electric connections
 The connections are, of course, self-evident requirements for the kettle operation. Still, a few factors should also be considered when selecting the location of the kettle.
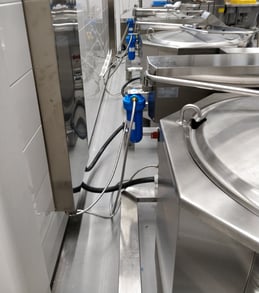
Firstly, the connection points of the kettle are located behind the kettle leg. The piping near the kettle back is recommended to be further connected with flexible cables and hoses to kettle inlets and connection points. Flexible cables and hoses are always needed with a freestanding design. This also allows minor adjustments on kettle position if required, e.g., for later re-organizing in the kitchen. There are multiple methods for a suitable enclosure of pipes and electrical cables near the kettle; please don't hesitate to ask for examples from us.
Secondly, plan the placement of water filters on the back wall, in mind that cartridges should be replaced every three months; the customer needs access to these.
Finally, remember that there are water quality requirements, especially water used in the steam generator inside the kettle jacket. Check your water quality and plan how and where, if needed, the necessary treatment equipment is located.
We'd like you to read more about the types of emptying pipes and valves and water connections and utilities of Dieta mixer kettles.

Download the Guide: Choosing the kettle >
Partner, you can find the guide on Extranet also.